
How to try sous vide without special equipment
Before you invest in expensive tools, use the ordinary kitchen equipment you already have to find out if sous vide is for you.


This is the third post in a five-post series about the sous vide cooking method:
- Sous vide pros & cons
- How I use sous vide
- How to try sous vide without special equipment (this post)
- Sous vide equipment
- Sous vide books, recipes, and other resources
The special equipment required to do sous vide kept me from letting myself get too curious about it for a long time. Slowly, my interest did build up over the years, but that final hurdle of the equipment was a big one. I didn't want to take the leap without being pretty darned sure this was something that wasn't going to sit gathering dust in a cabinet.
Here's the thing, though: sous vide doesn't actually require special equipment. The specialness of the equipment gets overblown. It's just heated water. The reason you buy the equipment is convenience. You can do sous vide with equipment you already have at home. You wouldn't want to do it this way over and over again, but it's a great place to start if you aren't sure the end result of sous vide cooking will justify the investment in the equipment.
There are two key steps in sous vide cooking: sealing the food in a bag without any air in it, and cooking the sealed food in a hot water bath.
Choosing a test food
I did this trial twice, both times with pork tenderloin. Chicken thighs or breasts would also be great for a trial run like this. You can see there's some wiggle room in both the temperatures and the times:
| Food | Temp | Time |
|---|---|---|
| Pork tenderloin | 140°-145° | 1-4 hours |
| Boneless chicken breast | 140°-160° | 45 mins-4 hours |
| Boneless chicken thigh | 175°-180° | 45 mins-4 hours |
The temperature you choose has an impact on the final texture. I'm linking to the Serious Eats guides for each of these, which will help you figure out where your preferences may lie.
The time range is huge! The minimum is the time it takes to make sure the center has reached the target temperature. The maximum is the time it can stay at that temperature before the structure starts to break down and get weird. I'd aim to go a little beyond the minimum for your trial, maybe 15 minutes or 3o minutes, unless you are just over it. I did my pork tenderloin for two hours, to be extra sure.
Salt the food before putting it in the bag.
Sealing the food without a vacuum sealer
In most sous vide, folks are using some sort of vacuum sealer to bag their food. But you don't need one! A freezer-safe Ziploc bag works great, and has the right kind of plastic to be safe for sous vide. You can use water's magical powers of displacement to squeeze the air out of the bag.
Fill a large pot with water, probably the pot you use for boiling pasta or making stock (you'll use this same pot of water to cook the food in the next step). Put the (salted!) food in the Ziploc but don't seal it shut yet. Put the bag into the pot of water, keeping the opening above the water line—you don't want any water getting into the bag. The weight of the water will press in against the sides of the bag, squeezing the air out.
Seal the bag, and put it in the fridge until you have the water heated to your target temperature.
This isn't a true vacuum seal, but it's good enough. Aside from sous vide cooking, this trick is handy for sealing up anything you want to package in the fridge or freezer—getting the air out helps things keep longer.

Maintaining a water bath without an immersion water circulator
First, let's talk about what an immersion water circulator is doing, because you, my friend, are going to be a human water circulator for the next hour or two.
The goal is to have a water bath with a temperature that is consistent from top to bottom, with no hot or cool spots, and for that temperature to stay as close as possible to your target temperature throughout the cooking time.
The way an immersion circulator does this is by sucking in water at its base, heating it, and pumping the heated water back out about six inches above its base, creating a constant circular flow of movement in the water. It has a thermostat to know exactly how much to heat the water to keep the temperature consistent.
So you'll need to perform three functions:
- Heat the water
- Monitor the temperature of the water, and adjust the amount of heat being applied
- Keep the water moving so no hot or cool spots can form
Heat the water
The heat source is going to be your stovetop. I have an induction stovetop, which I would guess made it super easy for me to keep the temperature consistent. This might be trickier on an old-school electric range, but I think a gas range should work okay.
To get things started, use medium heat, but once you close in on your target temperature, it'll take a bit of experimenting to find the lower burner setting that will keep it closest to your target temperature. Your target temperature is going to be well below boiling, so it's going to be a low setting.
Monitor the temperature, and adjust the heat
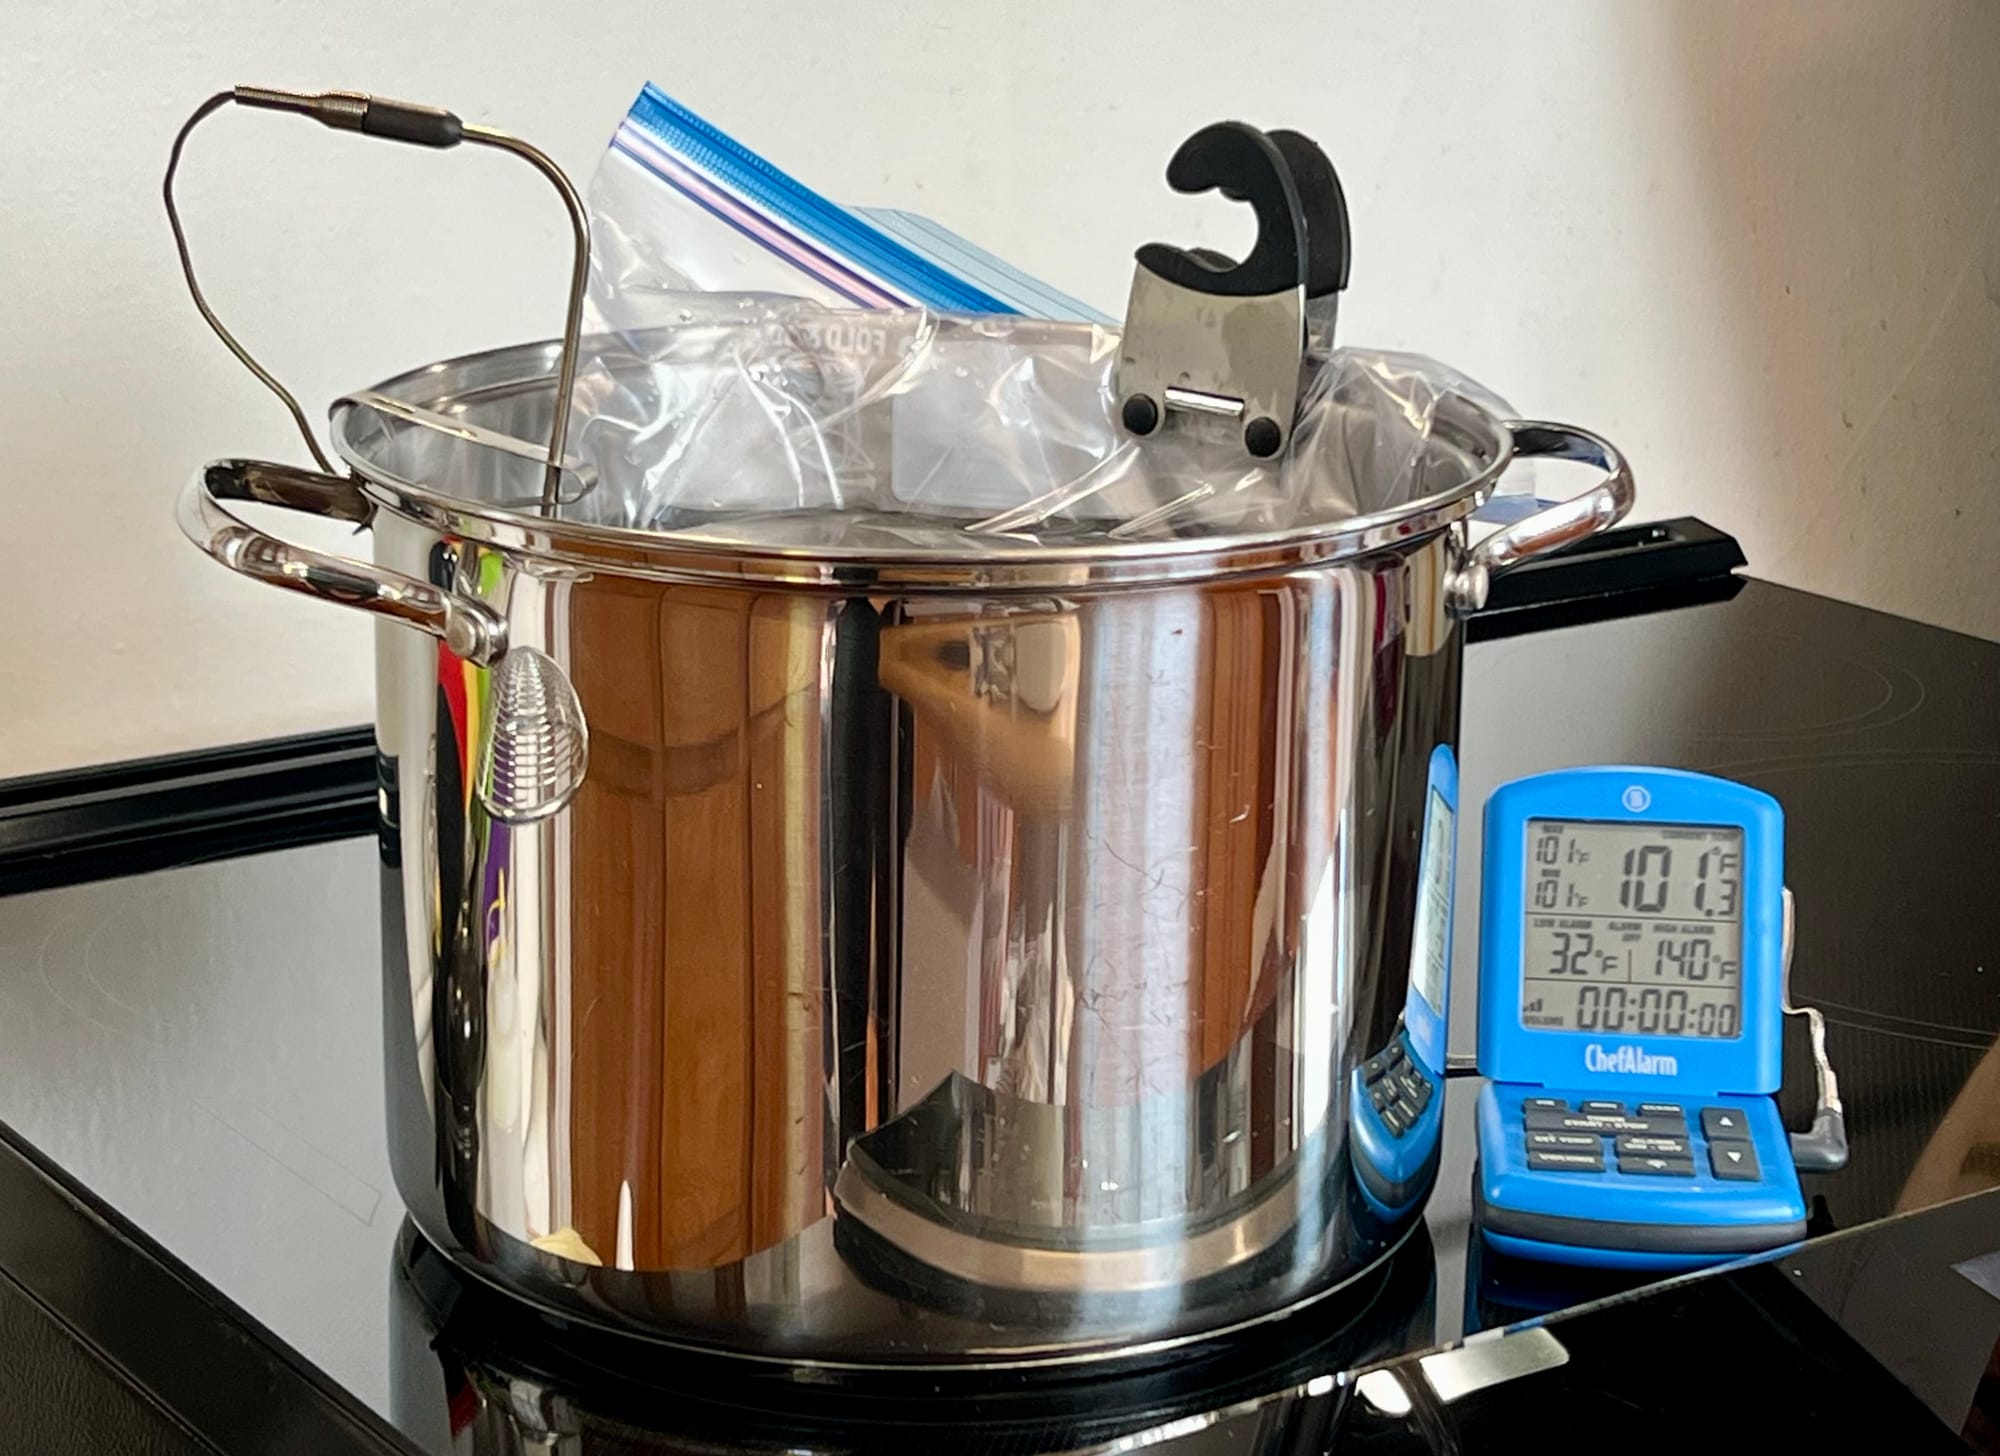
For temperature monitoring, I used my Thermoworks ChefAlarm. It has a probe that goes into the water, and it monitors maximum and minimum temperatures. It can sound an alarm if it dips above or below a range you set. This was great, because I was able to verify that over the course of my cooking trial, I had a temperature variance of only a few degrees.
But a feature-packed thermometer is not necessary, any cooking thermometer will do, as long as you trust it to reliably report the current temperature. Make sure the thermometer's probe is not touching the bottom of the pot, and try moving it around the water a bit to verify there are no corners of the pot with different temperature readings.
Be prepared to verrrrry slightly adjust your heat source to keep the temperature right where you want it, and be patient. You don't want big swings here.
Keep the water moving
The final piece, and the one where you're really going to value the immersion circulator you might eventually be buying, is to keep the water moving. You're going to stand next to this pot, and stir the water with a big spoon.
It's going to be boring. I did crossword puzzles on my phone while I babysat the pot. You don't have to do it constantly, but you can't let the water stay still for too long, either. Once the bag is in the water you won't have as much room to stir, just move the water as best you can, being mindful of any areas where you think the water may get kinda "stuck."
Add your bagged food
Once you feel confident that the temperature is correct and stable, add the bagged food. If you have more than one breast or thigh in the bag, make sure they're side-by-side in a single flat layer, not stacked.
With a proper sous vide setup, the heat is coming from the immersion circulator, which isn't touching the food, but here the whole bottom of your pot is a source of heat. Don't let your food touch the bottom of the pot! Make sure it's above the bottom of the pot by about an inch—I clipped the top of the bag to the edge of the pot.
When you add the cold food to the water, it will bring the water temperature down, so be prepared to adjust the heat on the burner. Once you've got the water temperature stabilized again, start a timer for your food.
Now you stand there, like a weirdo, periodically stirring the water, for as long as it takes to cook your food. When you feel pretty confident it's been cooking at the right temperature for long enough, you can pull it out, or you can keep it up for as long as another hour or two for chicken or pork. The food won't overcook.
Finishing the food
For ideas for finishing and serving the food, see my How I use sous vide post:
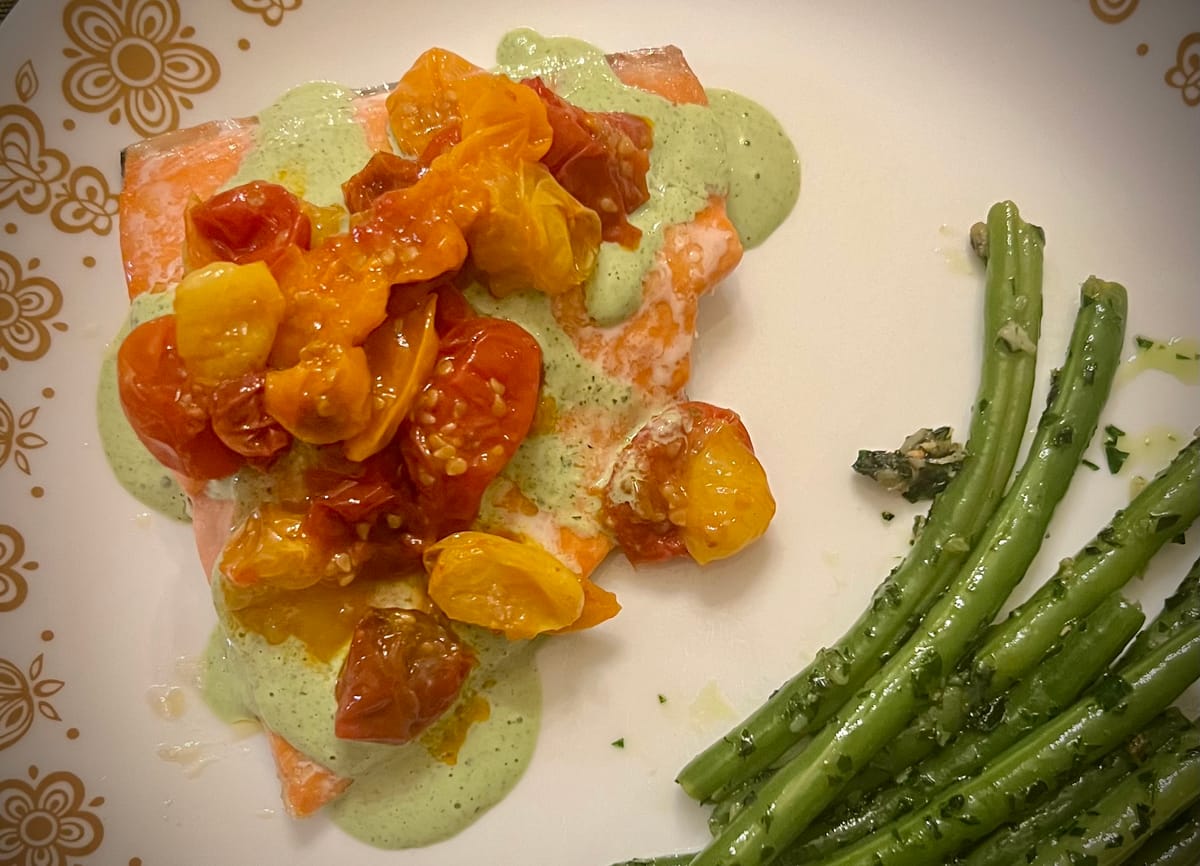
For pork tenderloin, you'll probably want to sear the outside of the loin before serving. Chill the loin in an ice bath for a few minutes, so that the searing won't overcook the insides. Dry the loin off very well, apply a spice rub if you'd like, then sear for a few minutes on each side of the loin. If the loin won't fit well in your pan, cut it in half.
For chicken breast or thighs, you can use them any way you would ordinarily use cooked chicken. Eat them straight, put them in a salad, toss them in a sauce, whatever.
How I knew sous vide was for me
When I did this trial the first time with pork tenderloin, I was impressed with the difference it made in the flavor and texture. Every bite was perfect; it was noticeably improved over the many pork tenderloins I've roasted over the years. However, I still wasn't sure I was ready to jump into sous vide with both feet.
When Christmas rolled around and I wanted to serve pork tenderloin, I realized I didn't want to do it in the oven—I wanted that sous vide texture again, so I did a second trial. That was when I knew it was time to invest in the equipment.
Coming tomorrow
Next time, I'll share which equipment I purchased and why, what I'd do differently, and I'll share a bit about your options.

There are no ads or sponsorships on I Have Doubt!
This post has links to products. They are not affiliate links. I don't get anything from telling you about the products.
Learn more